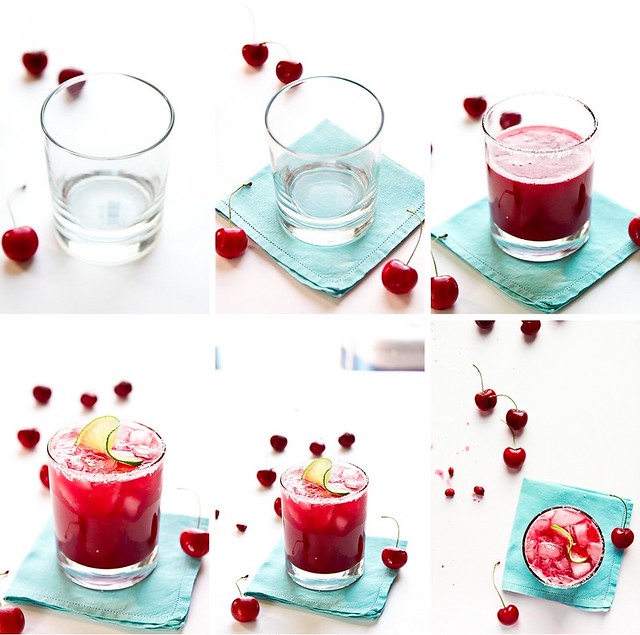
Having shot a number of cocktails margaritas in the last year or so, I’ve gotten the process down pretty well. Shooting the cherry margarita went a little something like this:
1 – Getting exposure set correctly, empty glass strategically placed over the barcode sticker on the poster board.
2 – Added a cocktail napkin that I scored from Etsy and cherries that I scored from HEB.
3 – Happy with exposure, I rimmed the glass with salt and poured the margarita in the glass. No ice yet – the clock starts ticking the second you add ice.
4 – Adjusted napkin placement and added more cherries. Happy with the composition and exposure of the shot, I added the ice and lime garnish and called it good.
5 – I pulled back to get a shot that would crop to a square/1:1 for submission to the “pretty food sites.”
6 – Not 100% happy with the fact that I couldn’t get those pretty splatter marks and pits in the picture shooting at 3/4ths, I shot from overhead. If I was going to ruin the poster board, I wanted it to count 🙂 Plus, after shooting like 12 margarita recipes, they all kind of start to feel the same.
7 – Start of happy hour (not shown) 🙂
Some notable things about the photos:
– The shot is backlit.
– My work surface is my coffee table, which I’ve moved against the window overlooking the patio (as seen here).
– My “background” is simply the matte side of a white poster board sitting on top of my coffee table.
– Because the extra set of hands needed to help me with the reflector (also seen here) for this particular shot was working Toddler Crowd Control, I used the flash to add more light to the front of the glass.
I’ll show you how I work with back-lighting in an upcoming Photo Friday. ‘Til then, keep calm and make margaritas!


