If you’ve ever emailed/chatted to ask me where I got a specific prop, there’s a really good chance that I responded with either “Goodwill” or “garage sale.”
Those are by far my top two sources for photography props and food styling accessories. They’re extremely budget-friendly and most of the pieces are well-worn and pretty unique when compared to, say, the small stack of 2-yr old napkins and placemats that I have from Target.
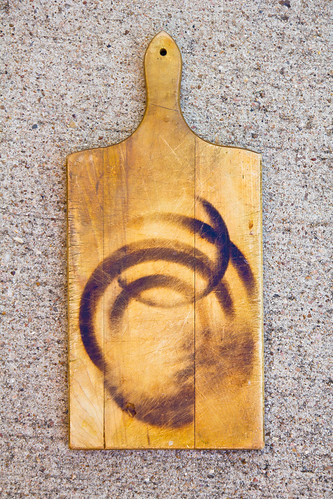
A few weeks ago, I picked up a second-hand wooden cutting board at Goodwill. I loved that it was worn and that the surface has definitely seen it’s share of serrated knives, chopped tomatoes, and sliced onions. And I loved that it had been used as a “holy crap, this thing is hot!!” trivet. And I super loved that it was priced at 99 cents. Seriously. 99 cents!
What I didn’t love? That golden, honey-yellow finish. What I wanted was a darker surface with that patina/aged wood look.
But I’m married to a hobbyist woodworker so I know that golden, honey-yellow finish is easily banished and that patina/aged wood look is just minutes away.
We stumbled across a pretty neat technique to quickly age wood when researching finishing methods for a house project: a mixture of tea and iron solutions can turn wood from bright “I’m brand new” yellow to “someone left me on the patio for 2 years” grey to even a “yeah, you just try to get this deep a color with regular wood stain” dark brown.
The science is simple. Okay, simple-ish. The iron solution is made from steel wool and vinegar. When brushed on wood, it reacts with tannins in the wood to mimic the aged patina that time and weather impart. And when extra tannins are applied to the wood in the form of a very strongly brewed tea, that stain gets even darker.
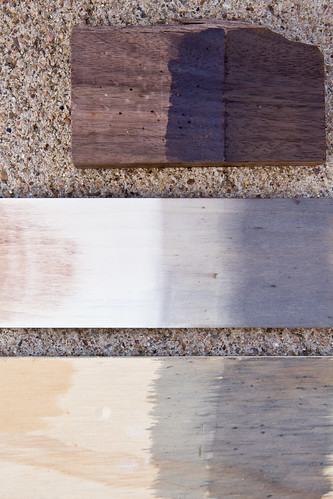
Top to bottom, that’s walnut, aspen (the wood that we used for our tabletop props), and pine using a 24-hour old iron solution. Left to right, that’s the wood in its natural state, painted with the iron solution, and then painted with tea and iron solutions. Oh, and I painted the walnut scrap backwards. Doh!
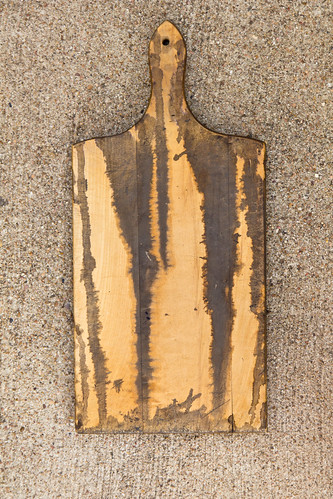
We used the new staining technique on the cutting board and ended up with a richly-stained, aged piece of wood that almost looks nothing like the original. And with the exception of the steel wool, we actually had everything else on hand. Total cost of the project was under $10. Not. Too. Shabby 🙂
And the solution gets stronger as it sits. After 72 hours, we were able to turn the surface of pine nearly black. It’s a beautiful finish for an otherwise budget cut of wood and definitely not one that’s easily achievable with ordinary wood stain.
Materials Needed
1 pad of 0000 steel wool – 0000 (it will state as such on the package) is the finest grade of steel wool and will disintegrate faster. Using a more coarse grade of steel wool will likely be okay, but you might not get as strong a reaction as quickly. Note that this is not the scrubby SOS pad you’ll find at the supermarket. You’ll want to go to a hardware store or a home improvement store to find it.
3 cups vinegar, I used cider
3 family-sized standard-brew tea bags
1 1/2 cup water
Medium-to-fine sand paper – it really depends on the condition of your wooden subject.
A wooden subject – any real wood will do, different woods will exhibit different staining characteristics.
2 paint brushes
Finishing wax or other food-safe wax/oil to polish the finished piece, if desired.
I lathered the steel wool with a few drops of dish soap to remove any oil. After rinsing it very well and shaking off excess water, I stretched apart the steel wool so it wasn’t so compacted, and then placed it in a large glass container.
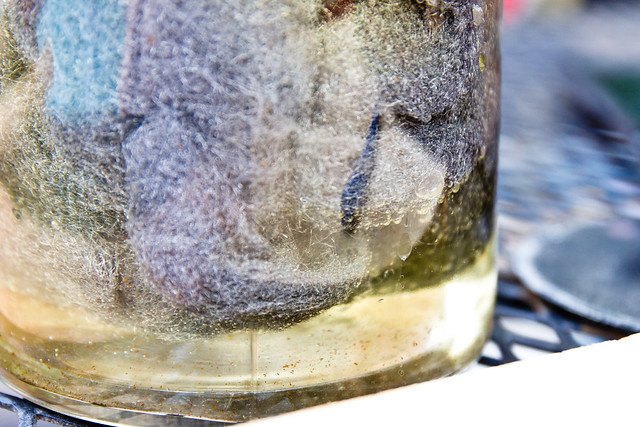
I made the iron solution by heating the vinegar just until bubbles formed in the pan and then slowly poured that over the steel wool. (I poured about 1/4 of it in, swirled it to warm the rest of the glass, and then slowly poured the rest in.)
I set the lid very loosely ajar and placed it on the patio overnight to allow the chemical reaction to get going. See the bubbles? Chemical reaction.
We’re all adults here, probably, but just in case we’re not… I am not an official source for material safety data, but there are some extremely important common sense-type things to note here:
– Chemical reaction = safety equipment recommended. Take precautions as you see fit. You know, gloves, goggles, work outside so there’s plenty of ventilation.
– Chemical reaction = fumes produced. Do not store this inside your house, do not hang out over the top of the jar while inhaling deeply.
– Chemical reaction = gas produced. Do not secure the lid without providing for ventilation first. When your project is over and you decide to secure a top to your jar, either drill a hole in the screw lid or use something like a rubber-banded cloth/plastic wrap/cheesecloth lid so gas can escape.
– Chemical reaction = not water supply friendly. From a fellow municipal water consumer, please do not pour this down the drain. The “recipe” above might be too big for you if you only plan to stain 1 small piece of wood. Consider cutting it down by as much as needed if you do not wish to store the extras on your “wood stain” shelf in the garage like us 🙂
The next day, I brewed up the tea. I boiled 3 tea bags with 1 1/2 cups water until the liquid was reduced to ~1/2 cup. I let it cool, squeeze out the used bags, and transferred the tea to a small, clean jar.
I lightly sanded all sides of the board just enough to get rid of the shiny finish so that the raw wood could take in the stain. I wanted to keep as many of the knife marks as possible.
I brushed tea onto the top and sides with a paint brush. After that soaked in, I brushed on a second layer.
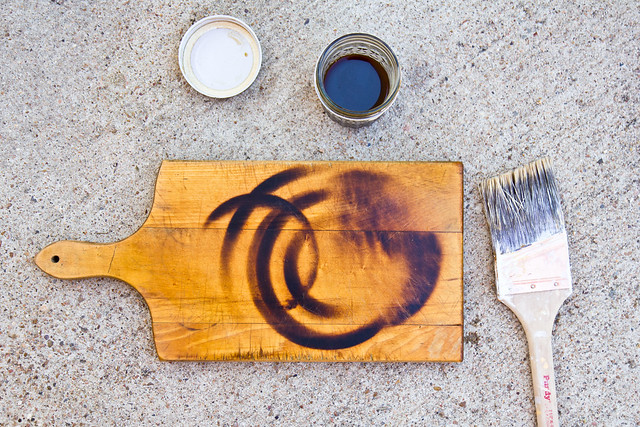
After the second coat of tea has soaked in, brush on your steel wool-vinegar solution using a second (clean) paintbrush to apply it evenly.
Nothing out of the ordinary appears to happen at first, but by the time the vinegar soaks in and dries, the magic will have happened. You might want to brush on a second coat – I did.
I also only did the top at first to have the back as a reference for contrast.
And after I took that picture, I sanded the black streaks away and stained it using a red wine (tannins!) reduction in place of the tea. The resulting stain was a bit lighter.
After the wood completely dries, wipe it down with a dry paper towel, and apply a finishing wax or other food-safe oil. My board had a very flat, chalky/ashy appearance to it that went away after using the finishing wax. I was left with a barely-there sheen and a richly stained cutting board.


