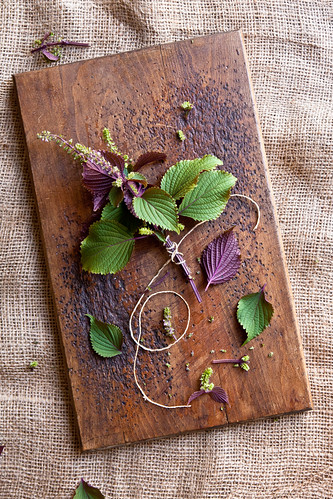
Next to, “What kind of camera do you use,” the second-most common question I get is about editing: Do you use Photoshop? Do you edit your photos? How much do you edit your photos? What do you do?
No. Yes. As little as possible. I’ll show you.
And I’ll warn you right now – you might be underwhelmed.
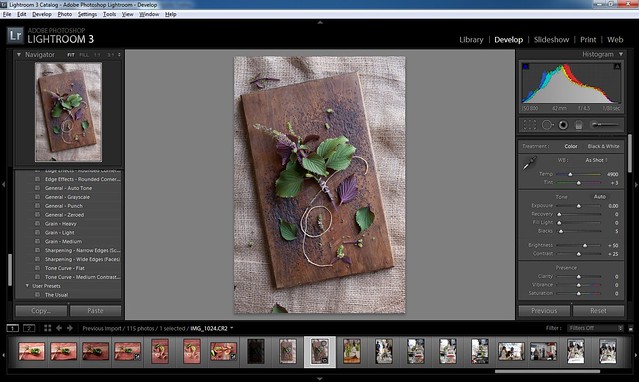
I use Lightroom and absolutely love it. It has everything I need, from excellent cataloging and organization to an entire spectrum of editing. I can also shoot tethered directly from Lightroom but that’s a story for another day.
Now this isn’t the tool that you’d use to stick Simon Baker’s face on your ex-boyfriend’s body… but that’s not a problem I have so I can’t really make any recommendations if that’s a feature you need 🙂
While I do love Lightroom, I do not love editing photos. I spend as little time as possible, we’re talking seconds in post-processing. A minute, 90 seconds tops. The tweaks I make are only to make minor corrections and give the photo a little punch, not drastically alter it or fix major fouls. It hasn’t always been like that, but now, if I can’t give a photo that little extra oomph in seconds, I try to identify what’s wrong, fix it, and reshoot. And I try to save myself some frustration – I review the photos before eating the subject 🙂
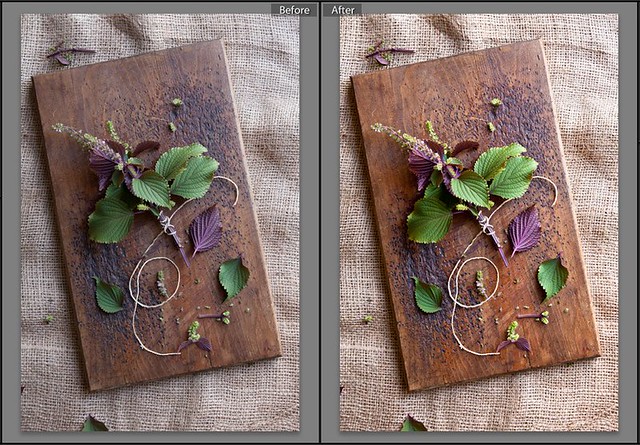
These are my post-processing Greatest Hits:
Temperature/White Balance – most of my photos come out a little on the cool side for my taste (white balance is measured with a temperature scale in Lightroom) so I almost always increase the temp for a warmer feel. I want my whites white, not blue-ish. What I do to the temperature is directly related to the time of day I shoot. Mid-day shots get little to no tweaking while early morning shots usually have to be warmed more. And late afternoon shots may even have to be cooled a bit.
*Exposure – Getting the exposure right on the camera is my goal but I usually find that I’m a little underexposed when I view the pictures in Lightroom.
*Blacks – I always increase the blacks. Few photos don’t benefit from the depth, definition, and richness that increasing the blacks gives.
*Contrast – Bumping up the contrast increases the difference between the darkest darks and lightest lights, it breathes life into flat photos and makes them pop.
*Lights – I increase the fill light just a bit to brighten the photo. Brighten is the wrong word. But it’s the one I’m going with.
Crop – I am completely incapable of holding my camera level so I have to straighten just about every photo. After I export the edited photo, I switch over to the 1:1/square crop and export a square photo for the “pretty food sites.” This lets me control the composition of the crop rather than using a site’s default square crop.
The areas marked with * are part of a custom preset I created in Lightroom. I call it “The Usual.” I realized that I was always applying the same edits to every photo so I used those settings to create a preset. With one click of the button, my usual edits are applied at once. Mucho time saved. It’s like my very own homebrew Instagram filter. Only not nearly as artsy.
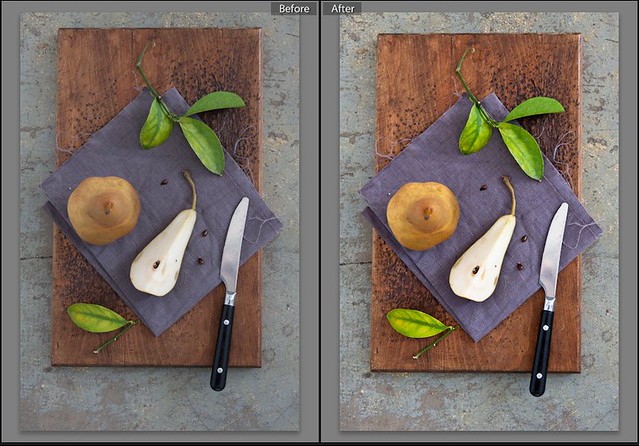
The photo of the pear was a little flat, a little dull, and a little cool straight off the camera. 15 seconds is the difference between Before and After.
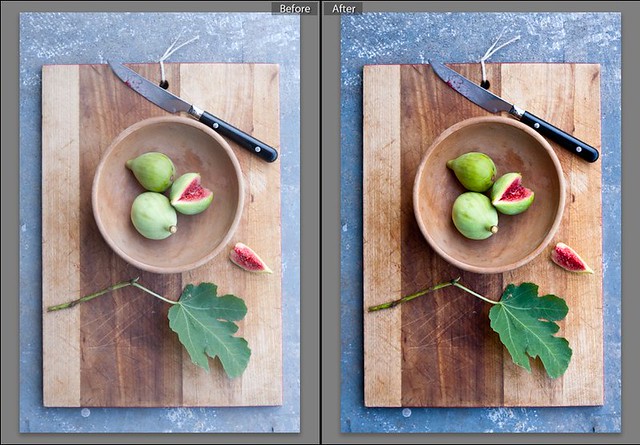
The photo of the figs, you can see I overexposed it a little bit on the camera. The amount of light flooding into the studio was… what’s a word for “incredibly magnificent x 1000?” It’s rarely a problem I struggle with at home – and I know you know what I’m talking about 🙂 I applied The Usual and then had to decrease the exposure a bit and increased the blacks a little more than normal. Otherwise, it’s so bright that the warmth and detail are lost. The difference between Before and After here was probably closer to 45-60 seconds.
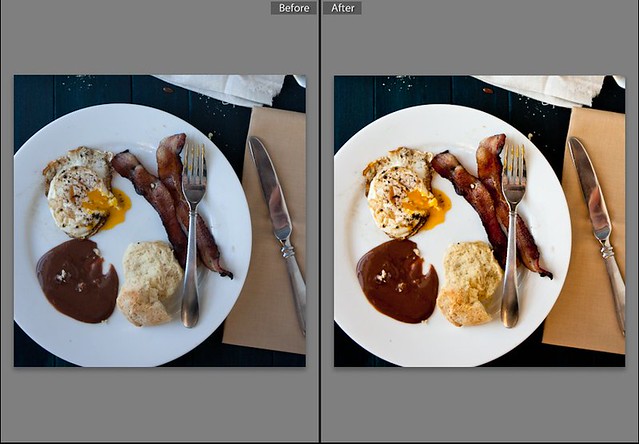
Too cool. A tad underexposed. The Usual. You get it 🙂


