How do you drink your hot chocolate?
I prefer mine spiked with a shot of Bailey’s Mint. But if I’m not sneaking in a little Bailey’s, I go for marshmallows. Growing up, I loved the Swiss Miss packets that came with “marshmallows.” You know the “marshmallows” that more resembled pencil erasers than an actual marshmallow. They’d rehydrate and then melt into a creamy layer that would leave you sporting a Got Marshmallow mustache.
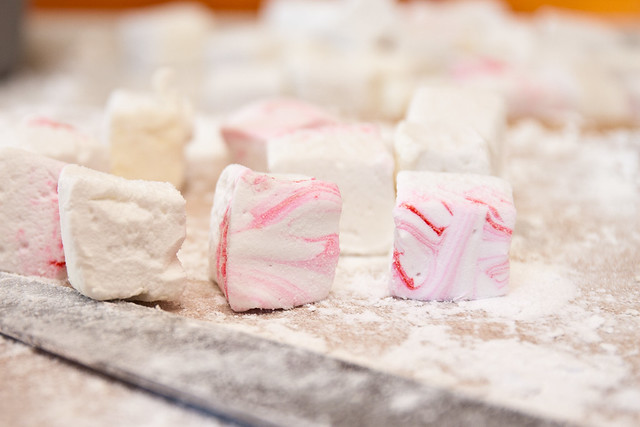
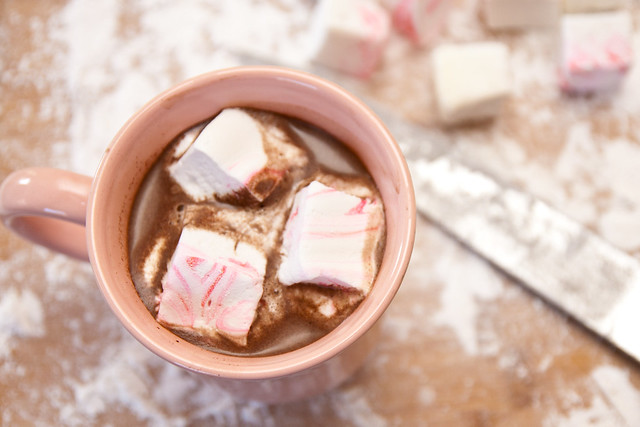
Homemade marshmallows most definitely do not resemble pencil erasers. They’re light, fluffy, and you can spike them with whatever flavor you want. I wanted peppermint. Toss in 2-3 marshmallows into a steamy mug and your hot chocolate slowly infuses with peppermint as that creamy layer forms on top. Yum!

I love to use Ina Garten’s Toasted Coconut Marshmallow recipe for a non-chocolate marshmallow base (and David Lebovitz’s recipe for chocolate marshmallow). It has consistently given me picture perfect, crazy fluffy marshmallows every single time. They’ll keep for ~2 weeks in treat bags dusted with plenty of powdered sugar.
Peppermint Marshmallows

Fluffy homemade marshmallows are spiked with peppermint to flavor your favorite mug of hot chocolate.
Ingredients
- 3 packages unflavored gelatin
- 1 cup cold water, divided
- 1 cup light Karo syrup
- 1 1/2 cup grandulated sugar
- 1/4 tsp salt
- 1 Tbsp peppermint extract
- Gel food coloring (optional)
- Baking or cooking spray
- Powdered sugar for dusting/stick-proofing
Instructions
- Place 1/2 cup cold water in the bowl of your stand mixer fitted with the whisk attachment. Sprinkle the gelatin over top and set aside.
- Clip a candy thermometer to a small sauce pan. Heat corn syrup, sugar, salt, and the other 1/2 cup cold water over medium heat, stirring until the sugar is dissolved. Turn to high and cook to 240 F (use a candy thermometer), 6-8 minutes longer.
- Turn mixer to low and slowly pour the hot syrup over the gelatin. Increase the mixer speed to high (and because I had an unfortunate experience once, I do this gradually over about a minute to prevent sugar lava from slinging on me... again) and let run for ~10 minutes. Add the peppermint extract and whisk for another 5 minutes until you have a glossy, smooth, and thick marshmallow mixture.
- While the marshmallow is whisking, heavily coat the inside of an 8x8 pan with baking spray (there's no such thing as over-greasing!). Coat with powdered sugar and tap out the excess. Pour in the marshmallow mixture (it will come all the way to the top). Drop 6-8 drops of red food coloring over the top and swirl with a knife held vertically. (Alternately, you could add this to the stand mixer and let the whisk go around the bowl 2 or 3 times.) Let sit for at least 4 hours (I do overnight) until solidified and cooled.
- Turn the marshmallow squares out onto a heavily powder-sugared surface. Using a long greased knife, cut the marshmallows into 1-inch pieces (they'll be 2 inches tall if you don't cut them in half horizontally, which I did). As you're cutting the marshmallows, keep all sides of the marshmallows dusted with powdered sugar and store in an airtight container for ~2 weeks.
Notes
Yields: ~128 marshmallows
Estimated time: 4 hours 45 minutes


